# Creating a Basic FRETS App
# Use the Starter Project
We have a convenient parcel starter project that demonstrates how to structure and run your frets application - with opinionated defaults like Parcel bundler, Tailwind CSS and XO linting presets.
This other starter project is slightly older and uses BassCSS, TSLint and Webpack - webpack starter project
git clone git@github.com:sirtimbly/frets-starter.git
cd frets-starter
npm install
npm start
# Custom Setup
The easiest way to incorporate FRETS into an existing javascript project is to install it with npm and then import it in the main entrypoint of your application.
First we need to create a new project directory somewhere and run npm init to get the project ready with a package.json file.
# Install Dependencies
Install the prod dependencies. (FRETS brings in 3 dependecies: maquette, path-parser and tslib)
npm install frets --save
Since we recommend writing FRETS apps using TypeScript, and compiling to plain JavaScript for the browser, you will either need to run tsc (the typescript compiler) or use a bundler that compiles TypeScript for you.
Install the dev dependencies
npm install -D frets-styles-generator tailwindcss typescript parcel
# Create Entrypoint
Create your primary typescript source file at src/app.ts
Create an HTML file in src/index.html. This should have a script tag at the bottom of the file before the closing body tag so parcel knows to bundle up a script.
<script src="app.ts"></script>
It should also have a link to a css file in the head.
<link rel="stylesheet" href="styles/app.css">
Here's the whole html file we will need.
<!DOCTYPE html>
<html lang="en">
  <head>
    <meta charset="UTF-8">
    <meta name="viewport" content="width=device-width, initial-scale=1.0">
    <meta http-equiv="X-UA-Compatible" content="ie=edge">
    <title>Document</title>
    <link rel="stylesheet" href="styles/app.css">
  </head>
  <body>
    <h1 class="font-bold text-2xl text-center mx-auto mt-3">A Simple FRETS Web App</h1>
    <main id="app" class="container mx-auto"></main>
    <script src="app.ts"></script>
  </body>
</html>
# Typescript Setup
You will need a tsconfig.json file in the root of your project.
{
  "compilerOptions": {
    "target": "es6",
    "module": "esnext",
    "strict": true,
    "importHelpers": true,
    "moduleResolution": "node",
    "esModuleInterop": true,
    "noImplicitAny": false,
    "noImplicitThis": false,
    "strictPropertyInitialization": false,
    "allowSyntheticDefaultImports": true,
    "sourceMap": true,
    "baseUrl": ".",
    "types": [],
    "paths": {
      "~*": ["./src/*"],
      "/*": ["./*"]
    },
    "lib": [
      "es5",
      "es6",
      "dom",
      "dom.iterable",
      "es2015.promise",
    ]
  },
  "include": [
    "src/**/*.ts",
  ],
  "exclude": [
    "node_modules"
  ]
}
# App.ts
Some important things need to be set up in the main typescript file.
First, we need a class defined for your data model. A plain old object and interface type will work too, but you will have to include some boilerplate properties for the internal registries.
import {PropsWithFields, ActionsWithFields, FRETS} from 'frets';

export class RealWorldProps extends PropsWithFields {
	public username?: string;
}
We can now "setup" an instance of a FRETS app with the model props class as the specified generic types in the first argument.
export type App = FunFRETS<RealWorldProps>;

const app: App = setup(new RealWorldProps(), (f) => {
  // specify all your app stuff inside here
});
You can add actions to your app like so:
const loginAction = f.registerAction('setUser', (e, present) => {
	e.preventDefault();
	present({
		username: e.currentTarget.value
	};
};
This simple action takes an event from an input element and passes it into the present function because the user intends to update the data model in this way.
We register these functions with app and we will be given a valid event handler function for any onX DOM event.
We will also want to add a simple model acceptor for handling data updates.5s
f.registerAccceptor((proposal, state) => {
  // include any business logic here
  state(proposal)
})
# Tailwind CSS
I really recommend building your user interfaces with a functional CSS framework like Tailwind. Frets is designed around the idea that writing hyperscript functions can be nicer than writing JSX or HTML templates if we provide a better, more fluent, API.
In order to use tailwind we need to create a new postcss.config.js file in the root of our project.
module.exports = {
	plugins: [
		require('tailwindcss')('tailwind.config.js'),
		require('autoprefixer')
	]
};
You should then be able to create your primary stylesheet src/styles/app.css (which is already linked in your html)
@tailwind base;

@tailwind components;

@tailwind utilities;

body {
  background-color: lightgray;
  font-family: 'Helvetica', Arial, sans-serif;
}


.btn {
  @apply font-bold py-2 px-3 rounded cursor-pointer text-center;
}

.btn-blue {
  @apply bg-blue-500 text-white;
}

.btn-blue:hover {
  @apply bg-blue-700;
}
Those button classes are an example of using tailwind to add special custom utility classes to your CSS.
We're not quite ready to run yet. We still need to write our view rendering method.
# Generating the atomic CSS app-styles class
In order to make DOM rendering functions more developer-friendly, we can turn that css file into a typescript file full of helpful methods by using frets-styles-generator.
./node_modules/.bin/frets-styles-generator src/styles/
This will create a new typescript file next to any existing CSS files in the path you specify. For instance if you have tailwind create an app.css file, it will get it's own companion typescript class at src/styles/app-styles.ts. You will be importing the $ and $$ members into your view rendering functions because those generated classes have a special "getter" method which creates a chainable api for generating dom nodes with long "utility-first" css class names in javascript without having to write out long un-refactorable strings. So instead of
h("div.h-12.w-12.rounded-lg.shadow-inner.bg-red-500", [children])
We can write this with the help of autocomplete/intellisense in our IDE. Never wondering if the class we typed in actually exists, and getting type-checker errors if a class name ever changes or disappears from the underlying CSS file.
$.div.h-12.w-12.rounded-lg.shadow-inner.bg-red-500.h([children])
# View render methods
In react you would call these SFCs. They are simply functions that should not have side effects and should return a VNode for maquette to use in dom rendering. I put each one in it's own file for clean organization, and some of them can get quite verbose. Because in frets we don't write any templates, html, or JSX.
This way of writing these class names is fun and satisfying and saves you from having to revisit tailwind docs all the time.
In src/views/root.ts
import {VNode} from 'frets';
import {App} from '../app';
import {$, $$} from '../styles/app-styles';

export const notification = $.div.maxWMd.mxAuto.flex.justifyBetween.itemsCenter.p_6.bgWhite.rounded.shadowXl.m_3;
export const input = $.input.bgGray_100.m_2.p_1.textBlack.rounded;
export const renderRoot = (app: App): VNode => {
	const usernameField = app.registerField<string>('fieldName');
	const passField = app.registerField<string>('fieldPass');
	return notification.h([
		app.modelProps.username ?
			`Hello ${app.modelProps.username}` :
			$$('form').flex.flexCol.h([
				$.label.h(['Username', input.h({
					onblur: usernameField.handler,
					value: usernameField.value
				})]),
				$.label.h(['Password', input.h({
					type: 'password',
					onblur: passField.handler,
					value: passField.value
				})]),
				$.button.btn.btnBlue.h({onclick: app.actions.login}, ['Login'])
			])

	]);
};
# Quick Note on RegisterField
Since our functions are stateless we have to access persistent state from the app.modelProps on the main app or from a registry of ad-hoc data fields that are keyed by strings. You see this above like this:
const usernameField = f.registerField<string>('fieldName');
You can also pass in a default value to start with. If it's been called once it won't overwrite. And if you pass in a default value then you don't need to specify the generic type.
const usernameField = f.registerField('fieldName', 'bob the builder');
Now usernameField is an object with 'value' and 'handler' members. The value of course is for displaying the current value stored in state, and the handler is for changing the value when a browser event causes an update. This handler assumes it was attached to a form field and receives a change or blur event.
Since we give the field a name, we can call the registerField function with that same name anywhere in the application rendering methods or inside the setup method and get a handler and other useful data like validation errors, and wether or not the field is "dirty" meaning has ever been changed from the default.
# Register the view and Mount to DOM
We just need to wire up this final method into our main frets app by importing root.ts inside of app.ts and then we have a fully functional frets app.
setup({}, (f) => {
  // ... app setup happening above
  f.registerView(renderRoot);

}).mountTo('app');
The argument passed to the mountTo method is the id of an element in the html which will be merged with the output of the render method. This allows for easy usage of skeleton placeholders and server-rendered content that can be replaced after the page has been "hydrated" and the JS is all loaded and parsed. Frets apps should pride themselves on being small, and light-weight so hopefully the user won't have enormous JS bundles that take forever to download and parse.
Maquette handles all of the virtual-dom diffing and updating in an efficient and simple manner. After any event handler is fired from within the dom tree that maquette is responsible for, the specified app render function is called again with whatever values are currently in the app state after being updated inside the actions (handlers). If an async call comes back later, it needs to call present() in an event or state() in a model accpetor to manually trigger a new DOM rendering cycle.
Now run the parcel dev server either from a script in package.json or with the command
npx parcel serve src/index.html
When you visit http://localhost:1234 you should see a screen like this:
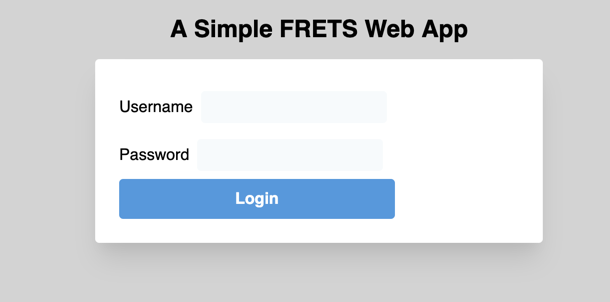
And when you enter text into the fields and click "login" you should see the state change.
If you want to see the final project that we created here you can get the boilerplate starter project from github.